Create Pivot Tables Easily with the Connection Wizard
The Pivot Table Connection Wizard simplifies the creation of pivot tables.
It supports the following data sources:
- Database tables, views, and stored procedures across all supported database platforms
- Web and file data sources in JSON, XML, HTML, CSV, and plain text formats
- Data services, including OData
- DBF and Excel files
Additionally, the add-in places query parameters in the ribbon, allowing you to easily modify query parameters and refresh data.
The wizard's steps are similar to those in the following wizards:
However, this wizard creates a pivot table in the final step.
Here are the steps to connect to database objects:
- Selecting a provider
- Connecting to a database
- Selecting an object
- Selecting parameters
- Inserting a pivot table
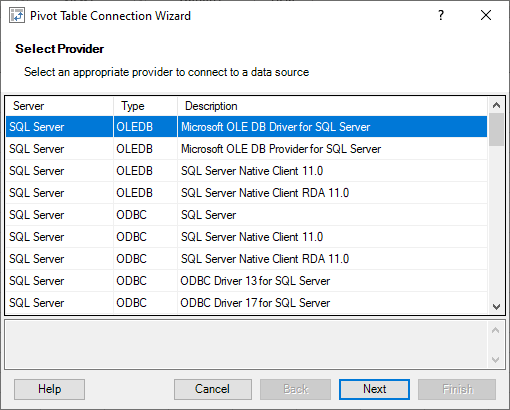
Step 1. Selecting Provider
Choose the desired data provider as outlined in the Database Connections topic.
- Use the Gartle Web Data Provider for web data sources and data services.
- Use the Gartle Text Data Provider for file data sources.
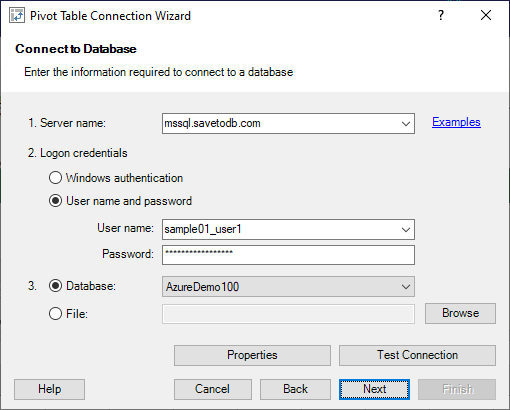
Step 2. Connecting to Database
Connect to a database as described in the Database Connections topic.
Step 3. Selecting Object
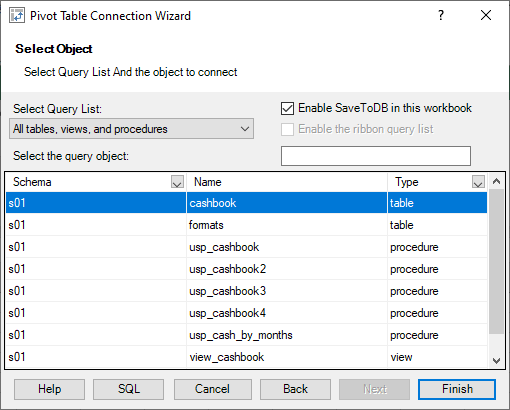
Select a source table, view, or stored procedure.
Here’s a sample screenshot:
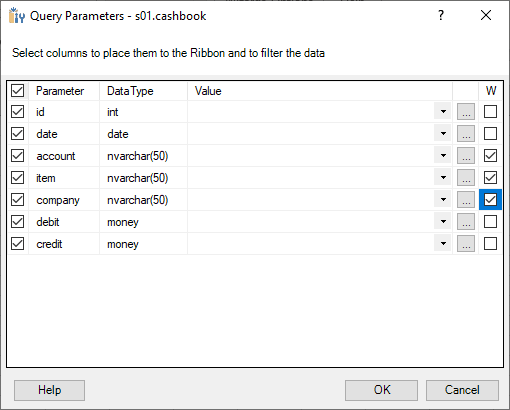
Step 4. Selecting Parameters
The add-in automatically detects stored procedure parameters.
You can select parameters to display on the ribbon using the rightmost column (W).
For tables and views, choose fields to select in the leftmost column (S) and fields to filter data in the rightmost column (W).
Here’s a sample:
Step 5. Inserting Pivot Table
Insert the pivot table into a worksheet.
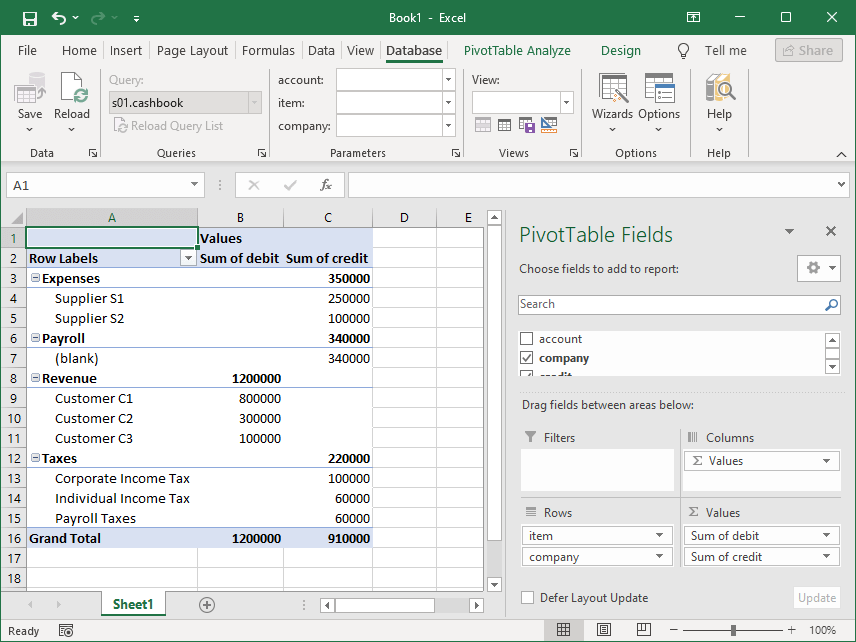
Here’s a sample pivot table:
